
What is TAST?
TAST or Take a Stitch Tuesday is a hand embroiderer’s challenge that started in 2007. Yes, it is that old, but I continue to run it, as literally thousands of people have enjoyed it – and this has given me immense pleasure to see so many people introduced to embroidery and who then go on to enjoy stitching.
The idea of the challenge is to work as many of the proposed stitches as you can. Each stitch is announced on Tuesday mornings – hence the name! With every announcement, there is a link to one of my stitch tutorials in my Stitch Dictionary that way, if you’re unsure of the stitch, you can find out how to do it.
TAST 2026
The next round of TAST will start the first Tuesday in January 2026 which falls on the 6th of January — save the date!
Although a new stitch appears every week, you do not have to stitch every week, so don’t worry if you’re a bit busy, or something gets in the way. With this challenge, you can do one stitch a month, one every two weeks, or one a week. It is totally up to you. This challenge is guilt-free and designed for busy people who want to build up their hand-embroidery skills. If you miss a few stitches, no one is going to reprimand you. Just join the catch-up crowd – there will be many people in the same situation and it’s a place to make friends, or simply skip a few stitches but don’t stop! Just keep stitching 🙂 We will be having four catch-up weeks throughout the year.
There are 2 Parts to TAST – you only need to stitch 1!
There are two parts to TAST:
- The first is a series of stitches that are suitable for beginners to intermediate stitchers.
- The second part, called Beyond TAST, is for intermediate stitchers and those stitchers who have worked the first part.
TAST For Beginners
If you are learning embroidery, the challenge will be to learn the stitch. The first 15 to 20 stitches in TAST are foundation stitches. Please note, I mean the first 15 stitches of the TAST stitches, NOT the Beyond TAST stitches. You need to know these basic stitches in order to master the more complex stitches. Most of the other stitches are either based directly on the foundation stitches or at least on the same hand movements you learned in the foundation stitches. Many people aim for the first 20 stitches and then dip in and out of the challenge as the mood takes them. That is fine too. If you want to learn the basics of hand embroidery, choose the first 20 stitches.
If you’re an experienced stitcher and you want to explore hand embroidery stitches a bit further, then Beyond TAST is ideal for you. See the information below about Beyond TAST.

Is there a TAST Project?
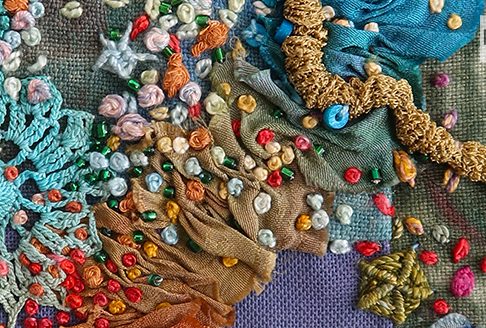
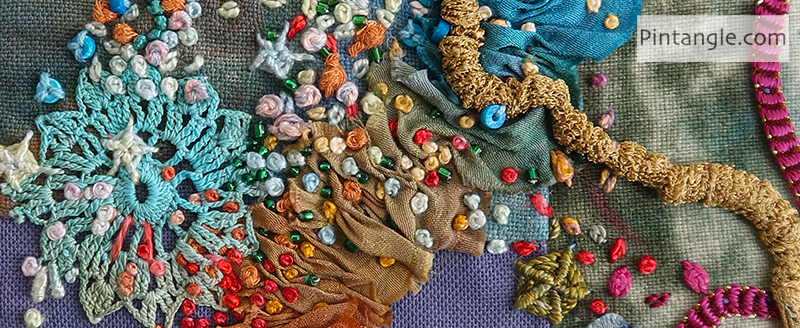
There is no particular set project for TAST. You can stitch anything you like. The idea is to experiment with stitches. The fabric you stitch on, the format you choose, or the project you make is totally up to you. Some people make a sampler, others a fabric book, some make a crazy quilt block, while others make fabric postcards. You can include the stitch on a current project too! The challenge is to work the stitch – it does not matter where.
What materials and tools do I need for TAST?
The material you choose to stitch on really depends on the project you have in mind. You do not need to go out and buy special threads or fabrics. You can stitch:
- on anything you choose,
- in any way you choose,
- using anything you choose.
The idea is to explore the stitch in as many different ways as possible. I have, however, written an article What hand embroidery supplies do I need? – which offers some guidance for anyone who is just starting out. These are suggestions only and the choice is yours.
I also have 2 chatty videos What fabric can I use for hand Embroidery? Is a video that answers the question. Many beginners do not realise that you can use all sorts of material to embroider on so I show various fabrics and point out some of the pros and cons.
Choosing Threads for Hand Embroidery mainly points out there is more than stranded cotton floss to stitch with and shows you some threads available on the market.
Tips
For those who are just starting out, one tip is to test the stitch on small scraps of fabric or keep a ‘doodle cloth’. Just test it out a bit before using it on your project.
When learning a stitch, allow yourself to experiment first. Start off with a freeform sample on a small piece of fabric. Try thick threads, thin threads, shiny threads, and dull threads. Change your scale, colour, and texture, and see how it looks. Focus on these, as you learn the stitch and then move to a more controlled and traditional sample of the stitch.
Why work this way? If you start off with a free-form sample you can learn the hand motion and rhythm of the stitch before trying to bring it into tight control. Once you have the rhythm and motion feeling right in your hand then try and work a traditional sample of smaller, controlled stitches. Many people want a perfect stitch sample instantly. But really, you are trying to master two skill areas at once. By this, I mean some people try and master both the rhythm of the stitch and the refinement of keeping it inline or inside a shape, etc – at the same time. For them, it can be an exercise in frustration! So my tip is to build your skill development one step at a time. This is also useful to remember when teaching young folks too.
If you have trouble with fabric tension, read my article on How to bind and use an embroidery hoop – as it covers not only binding a hoop, but what size to use.
Also, I have a tutorial online that covers How to start embroidery without a knot.
The Beyond TAST stitches
For people who have done TAST, or are experienced embroiderers, Beyond TAST offers a more complex stitch to explore. These will be announced each week alongside the TAST stitch.
Of course, as with regular TAST, this is a guilt-free challenge, with a loose structure so you can swing in and out of it – joining in some stitches and skipping others – if need be. It is up to you to use the Beyond TAST challenge, in whatever way suits your life and encourages your creativity. My main aim in running these challenges side-by-side is so people who are new to hand embroidery can see how rich, diverse and creative stitching can be.
How to join
Follow Pintangle and have it delivered to your inbox
You can have Pintangle delivered to your inbox — In the side bar use the Subscribe to Pintangle box or If you are on a mobile scroll to the bottom the of the page to find the Subscribe to Pintangle option. In either case type in your email address and click on the Subscribe button below. Then check your email inbox for a confirmation email and click the link to confirm your subscription. If you don’t see a confirmation email, check your spam folder — sometimes the computer puts it there.
TAST Interviews
I ran a series of interviews during 2017 to mark that the Take a Stitch Tuesday Challenge had been running for a decade. I interviewed stitchers about their hand embroidery and featured their work. It makes for an interesting read! Make a cuppa and browse the stitching stories of these wonderful women who gave up their time to answer my questions.
Interview with Maya Mathew of Million Little Stitches
Interview with Elizabeth of Sew in Love
Interview with Nell Loops of Artisanloops
Interview with Melody Lord
Interview with Barbara B of Spiel mit Textil
Interview with Christine B of Patchwork Allsorts
Interview with Gerry Krueger of Older Rose
Interview with Kimberley our Chicken Little Lady
Interview with Chitra of Jizee6687’s Weblog
Interview with Queeniepatch of Queenie’s Needlework
Interview with Maureen of CrazyQstitcher
Interview with Angela of Princess Bubbles Creates
Interview with Renee of Hand Stitched Treasure
Interview with Annet of Fat Quarter
Where to Share
The whole point of this challenge is to share what you have learnt and done. Most people join the TAST facebook group. For those doing Beyond TAST it is the same Facebook group. If you are a hashtag-type person, others use these hashtags regularly #tastembroidery, #takeastitchtuesday and #pintangletast on places like Instagram twitter etc.
If you are not a social-media type person and do not like Facebook I have the TAST flickr group. Or you can photograph your sample, share it on your blog, or wherever you hang out online, and leave a comment each week with your full web address so people can visit your page and see what you have done. In other words, put your address in the comment and include the http:// bit as then it will become a live link. Make it easy for people to visit you. Please, if possible link back here, and share news about TAST on your social networks so that people hear about the challenge.
Where are the past stitches?
If you want to find the previous stitches you can find them on the Category page here.
Just work your way back! Goodluck and Enjoy TAST.
My book for creative stitchers
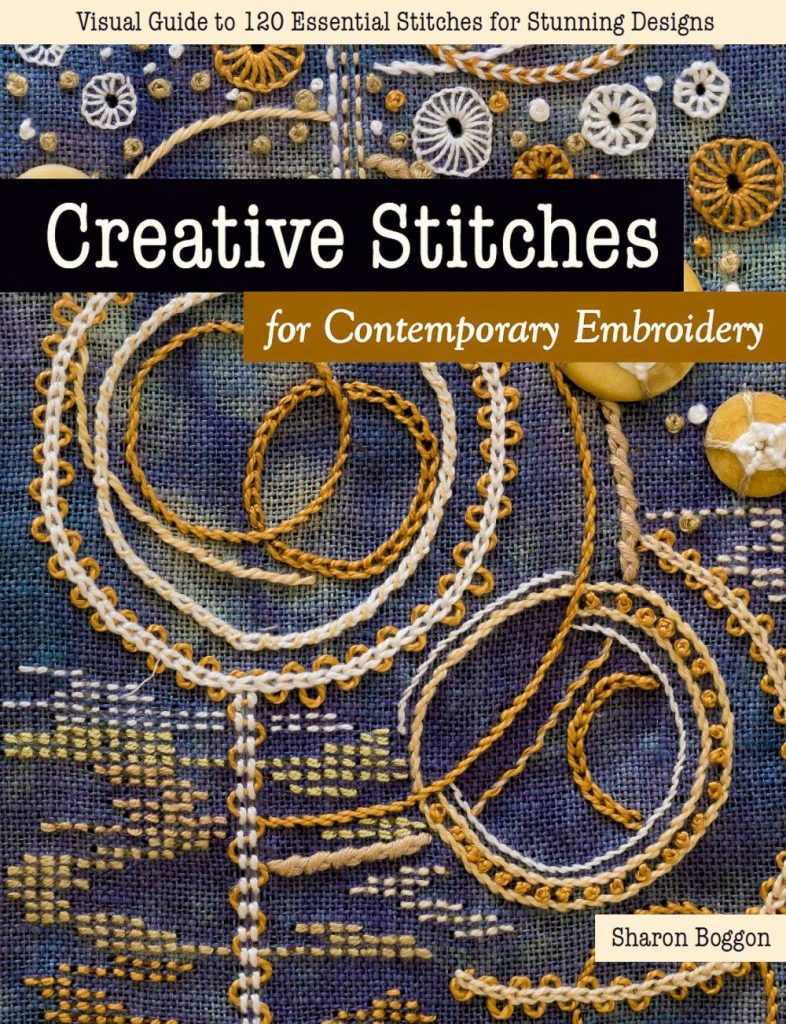
If you enjoy my site you will gain real value from my book: Creative Stitches for Contemporary Embroidery: Visual Guide to 120 Essential Stitches for Stunning Designs
Feeling stale? Wondering how to add sparkle to your embroidery? I have aimed Creative Stitches for Contemporary Embroidery to be suitable for both beginners and seasoned embroiderers. It introduces techniques to encourage your creative interpretations of stitches. I guide you towards discovering play-points in your embroidery by varying the height and width; by stacking stitches; or by filling multiple rows with the same stitch. With creative variations and demonstrations of tiny tweaks, You will be ready to head off down your own creative path and, of course, illustrated with plenty of eye candy!
Looking forward to starting something new
TAST sounds interesting. I think I’d like to give it a try.
Hi Shiela everyone is welcome to join in – have fun!
Looking forward to starting tast , I tried to do it 2024, suffered a hand injury, lost my mojo – ty
Hi Lizzie I hope your hand is better and you have fun this year
Fascinated by this way of learning how to stitch. Appreciate the insights.
So excited to be part of this!
Looking forward to a new challenge for 2025!
I would like to join the new challenge for 2025 and learn new stitches
I would be interested in the TAST please could you add me to your mailing list.
Thank you
Hello Isilda you can subscribe to the site in the side bar or if you are on mobile scroll to the bottom and the subscribe field is there – thanks !
I am looking forward to this, this year! Thank you!
I want to be notified of new stitch each Tuesday. I do not wish to buy anything at this point
Yes no worries just subscribe – the field is in the sidebar or if you are on a mobile scroll tot he bottom
I seen TAST for years and will now join for 2024! Excited!
I’m hoping this is how I subscribe to the weekly TAST and receive weekly emails detailing this week’s stitch
Hi Tracey the subscribe button is in the side bar of the site – or if you are on a mobile you need to scroll to the bottom – hope this helps
I have subscribed in March 2023, and get TAST.
I’ve not seen the other Challenge…
Can I look back somewhere on previous ones please?
Love your book and thanks for this access.
Cheers Joyce
HI Joyce at the moment I am only running the TAST challenge – they are all on the website. Hope I am answering your question.
Pingback: Log Cabin – Airy Nothing
How can I join this wonderful project ?
Anne Just join in – no sign up is required. If you are on facebook you can share work in the TADT group – the link is at the bottom of each article. Or share on instagram. Or don’t share! Enjoy it what ever way is best for you.
Pingback: Suddenly September – Airy Nothing
Im very interesting by embroidery …. I am french and live in Rhône Alpes near lyon
Hi Mireille Welcome to my website. You live in a very beautiful part of the world.
Hi just found this website and now very much looking forward to scrolling thro and while away an afternoon or two
Thanks Julia – enjoy a cuppa while browsing
I have trying to teach myself wool applique but have some trouble with some of the stitches required.
Saw about this site on Facebook so I’m hoping it’ll help.
Je désire rejoindre le défi de Tast. Merci et à bientôt de vous lire
You are doing an amazing job for the community. Much Appreciated
Thanks – Enjoy TAST
Great challenge, thank you! I just found out about it, so I missed the work done in January – where do I find the first stitches?
Hi Carmen if you go to the TAST category they are all there hope this helps
https://pintangle.com/category/challenges/take-a-stitch-tuesday/
Pingback: Embroidery piece - Studio Paars: my first try at free embroidery
Pingback: glasses cosy diy - Studio Paars: DIY: sew an embroidered glasses cosy
Pingback: embroidery nature - Studio Paars: And another felt cuff
Pingback: Vrij borduren • Studio Paars • workshops | blog | shop
Pingback: En nog een geborduurde armband in bruintinten • Studio Paars • blog
Pingback: lavender felt embroidered bracelet - Studio Paars: Lavender cuff
Pingback: brillenhoesje maken - Studio Paars - geborduurd brillenhoesje naaien
Pingback: Armband rood met zwart van vilt • Studio Paars • workshops | blog | shop
Pingback: Felt cuff in red & black - Studio Paars: embroidered bracelet
Pingback: embroidery stitches french knot - Studio Paars: embroidery classes
Pingback: Learn Hand Embroidery -
Pingback: UFOs: Part 1 – Airy Nothing
I would like to try a stitch a week please.
Gretle welcome! It’s not complicated just join in. Here is the FAQ https://pintangle.com/tast-faq/
I would like to subscribe to the Tuesday stitch as a beginner. I cannot subscribe since I don’t have a computer and there is no sidebar.
Thank you for the opportunity.
Sandra if you are on a phone, scroll to the bottom the subscription field is there.
Yes
I would like to join TAST and receive a stitch to do each Tuesday.
Karen to join TAST and have the announcements delivered to your inbox use the subscribe feature in the sidebar. Enter your email address, and when you get the confirmation email make sure you say yes and you are all set!
If you are on a mobile or tablet you will need to scroll to the bottom to find the subscribe feature. Hope this helps
So nice!
Pingback: Stitching – Airy Nothing
I just discovered this treasure.
I’m an old teacher,WHO hated all kinds of handycraft when I was a girl. Every other woman in the family were SO good in stiching , chrochet,embroidery,weaving
and so on, and everything had to be PERFECT. ( I remember an old relative, who – sitting at our coffe-table suddenly pointed her finger at the tablecloth and said: ” There is an error in the weaving here”, and my mother was so ashamed!)
I didn’t like to always be compared, in a bad way,so I did not try.
Later, I made somesmall things but it took so longtime and were näver good enlighet, not evenfor my own eyes
Not, have starter again ( in embroidery I do not workshop make both sides perfekt,I just sew.
I very much like get your mail!
Pingback: Herringbone stitch for grass | CrazyQstitcher
Pingback: Stekenboeken heb je nooit genoeg! - Tree of Needlework
Pingback: TAST 2021 | Connie's Creations
Wood household furniture possesses one thing quite organic about it.
There is this sense of warmth, of attribute and of elegance that can easily be be discovered in wood furniture.
Wood is birthed coming from the planet.
Pingback: 2018 TAST | a case of the Crafties
Pingback: TAST: Roundup | a case of the Crafties
Pingback: Geborduurde armbanden • Studio Paars • workshops | blog | shop
Hi, I tried to subscribe but the confirmation link said that the activation failed because I “confirmed” from a different email address (one that aggregates all my mail) than the one linked to my WordPress account. I can subscribe with a different address or add the one I subscribed with to my word press account but can’t figure out either. Please help. Thank you.
Hi Patricia Thanks for contacting me. I have just sent you and email. I am sorry you are having trouble.Your email address is listed as being a follower so you should get the posts. Hopefully on the 7th when I start up again it will work for you OK.
Sharon, I participated in 2018s TAST and finally finished it! Thank you so much for sharing your love of embroidery – I am miles ahead of where I was before I tried TAST. Have a look here: https://www.thecrafties.com/2019/12/tast-bunting/
I’m interested in being a part of TAST. Great opportunity to refresh my embroidery stitching skills!! Thanks
Christine I removed your email from public view and have subscribed you – you will get an email asking if you want the subscription and you will need to accept to have the software work. Welcome!
Happy new year
I want to join TAST design challenge
Bodil in Sweden
Bodil Welcome to the challenge and I hope you enjoy it!
Pingback: Algerian Eye Stitch Embroidery Sampler for TAST » Knitting-and.com
Pingback: Alternating Up and Down Buttonhole Stitch Embroidery Sampler » Knitting-and.com
Pingback: TAST - Fancy Herringbone Stitch Sampler » Knitting-and.com
Pingback: TAST - Fancy Bobbin Edging, at Last! » Knitting-and.com
Pingback: Lock and Feathered Chain Stitch Embroidery Sampler » Knitting-and.com
Pingback: Up and Down Buttonhole Stitch - TAST Week 55 » Knitting-and.com
Pingback: Basque Stitch Embroidery Sampler for TAST » Knitting-and.com
Pingback: Catching Up on the TAST Embroidery Challenge » Knitting-and.com
Pingback: TAST Sheaf Stitch Embroidery Sampler » Knitting-and.com
Pingback: ooh la la! | McAnaraks
Pingback: Cretan Stitch Samplers and Post Apocalyptic Fish, TAST Week 4 » Knitting-and.com
Pingback: Embroidery Stitch Samplers Books Part 1 – Debreena
Pingback: French Knot Sampler for TAST 2015 » Knitting-and.com
Pingback: The End of a TASTy Era » Knitting-and.com
Pingback: Detached Chain Stitch Sampler for TAST, Week 7. » Knitting-and.com
can i subscribe please
Sharon, what a great challenge to foster the love of hand embroidery. I have done the stitches so far and they were not too difficult. I might even do a crazy quilt piece (who would have thought!) to try out more new stitches. I am also looking for stuff to add to my embroidery. There’s lots of doodads hidden away in drawers.
Thank you for being so generous.
Me gustaría unirme al Challenge.
you are welcome to join in
Buenas tardes Sharon: .Muchas gracias por aceptarme. Es maravilloso todo su trabajo y estoy agradecida por su generosidad al compartir su conocimiento de esta manera, del hermoso arte del bordado a mano.
Pingback: 2018 TAST • a case of the Crafties
Looking forward to joining in 2019.
Pingback: The Green Man Sampler for Beyond TAST » Knitting-and.com
Pingback: Beyond TAST - Woven Stitches Sampler » Knitting-and.com
Pingback: Sometimes You Have No Idea What to Embroider, then Three Busses Come at Once » Knitting-and.com
Pingback: TAST: Roundup • a case of the Crafties
Pingback: TAST - Magic Chain Stitch Embroidery Sampler » Knitting-and.com
Pingback: Half Chevron Stitch Sampler » Knitting-and.com
Pingback: TAST Catchup Post - Part 1 » Knitting-and.com
Pingback: Beyond TAST Embroidery Samplers - Rice Stitch and Layering » Knitting-and.com
Pingback: I'm back! • a case of the Crafties
I would love to learn embroidery stitches, thank you for giving me the opportunity..
Denise
Thank you for adding me I’m looking forward to developing my needlework and learning new stitches
Pingback: glasses cosy diy - Studio Paars: ,,,DIY: sew an embroidered glasses cosy
Pingback: TTMT #38 Taking it slow and a year of buttons – TTMT – Talk To Me Tuesday
Pingback: embroidery nature - Studio Paars: ,,,And another felt cuff
Pingback: lavender felt embroidered bracelet - Studio Paars: ,,,Lavender cuff
Pingback: ,,,TAST 2012 #27: Bonnet Stitch - Studio Paars: embroidery bonnet stitch
Pingback: ,,,TAST 2012 #25: Cable Chain Stitch - Studio Paars: embroidery cable chain stitch
Pingback: ,,,TAST 2012 #24: Buttonhole Wheel - Studio Paars: embroidery buttonhole wheel
Pingback: TAST 2012 #22: Knotted Cretan Stitch - Studio Paars: embroidery knotted cretan stitch
Pingback: ,,,TAST 2012 #21: Butterfly Chain Stitch - Studio Paars: embroidery butterfly chain stitch
Pingback: ,,,TAST 2012 #20: Bullion Knot - Studio Paars: embroidery bullion knot
Pingback: TAST 2012 #19: Half Chevron Stitch - Studio Paars: embroidery half chevron stitch
Pingback: ,,,TAST 2012 #18: Crossed Buttonhole Stitch - Studio Paars: embroidery crossed buttonhole stitch
Pingback: ,,,TAST #17: Wheatear Stitch - Studio Paars: embroidery wheatear stitch
Pingback: ,,,TAST #15: French Knot - Studio Paars
Pingback: ,,,TAST 2012 #15: Stem Stitch - Studio Paars: embroidery stem stitch
Pingback: ,,,TAST 2012 week #13 - Studio Paars: learning embroidery stitches
I thought I had signed up for TAST, but have never heard anything through email. What do I need to do?
Thank you.
Eddi Miglavs
Eddi sign up again as probably you forgot to confirm the subscription – the software will not work if you dont confirm
please sub me up sounds a lovely idea to try
Pingback: Embroidery with Take A Stitch Tuesday - Studio Paars: workshops & [...]
Pingback: TAST 2012 #4: Cretan Stitch (Kretasteek) - Studio Paars: borduren kretasteek
Pingback: ,,,TAST 2012 #4: Cretan Stitch - Studio Paars: embroidery cretan stitch
Pingback: TAST 2012 update - Studio Paars - borduursteken leren
Pingback: TAST 2012 #3: Feather Stitch - Studio Paars: borduren feather stitch
Pingback: ,,,TAST 2012 #3: Feather Stitch - Clone - Studio Paars: embroidery feather stitch
Pingback: ,,,TAST 2012 #2: Buttonhole Stitch (Festonsteek) - Studio Paars: borduren festonsteek
Pingback: ,,,TAST 2012 #2: Buttonhole Stitch - Studio Paars: embroidery buttonhole stitch
Pingback: ,,,TAST 2012 #1: Fly Stitch - Studio Paars: embroidery fly stitch
Pingback: ,,,TAST 2012 #1: Fly Stitch (Vliegsteek) - Studio Paars: borduren vliegsteek
Pingback: TAST 2012 #13: Satin Stitch (Platsteek) - Studio Paars: workshops & handmade
Pingback: ,,,TAST 2012 #13: Satin Stitch - Studio Paars: workshops & handmade
I’d like to join
Pingback: Monthly Art Project – Paper, Plastic, String – and Fabric and Thread too
Difficult to try to join. Hard to understand. But looks lovely and I would love to join
Betty just join the face book group – click on the link and it will take you there. Answer the questions so I know you are not a spammer and you are in the group! It’s not difficult.
Pingback: Beyond Tast: Pattern Darning
Pingback: TAST Catch Up 5 out of 5. I Did It!
Pingback: TAST Catch Up 4 out of 5
Pingback: TAST Catch Up 3 out of 5
Pingback: TAST Catch Up 2 out of 5
Pingback: TAST Catch Up 1 out of 5
Hi! I tried twice to subscribe, but it gave me an error. I subscribed years ago but haven’t gotten an email in a long time – could that be the problem? I’m not sure what email I used back then, though. I’m so glad you’re still doing it! 🙂
Laura Sorry you are having trouble. I just sent you an email basically asking if you received a confirmation email when subscribing as you need to confirm that you want to subscribe and it could be going to your spam folder.
Looking forward to TAST in 2020
Pingback: A little bit of stitching – Site Title
Hi Sharon, if I want to work further into a Stitch than I did last time in TAST can I still add previous postings with new bits?
Or would you prefer only new work for this year? I should have asked this previously but had not struck me until the weekend.
Yes sure Lesley the challenge is very flexible – do what brings you satisfaction
I thought I’d signed up to the 2018 TAST challenge but don’t seem to be receiving the emails informing us of the stitch each week. Fortunately I have a friend who lets me know. Is it possible to check and see if I am on the list and if I’m not how do I go about signing up. Many thanks
Patricia When you sign up you get a confirmation email you need to click through and confirm that you want to receive emails from me – the software dose not allow me to simply to add you to the list. Why? that is what spammers do – they create lists of peoples emails and send uninvited emails. So the software makes sure I am not being a baddie by asking you to confirm and give permission to send an email. If you dont see a confirmation email arrive after signing up check your spam box. So that is long winded way of saying you need to sign up again – the link is in the sidebar of the site or if you are on a mobile or tablet scroll to the bottom and look for the follow options
Pingback: WIP-TAST-ic Wednesday 1 | a case of the Crafties
I have collected my threads and selected my cloth. I’m ready to go Beyond! [Cue the soundtrack.]
How do I get a Pingback of a post I write to appear in your comments? I often blog about my stitching progress
hi Diane if you link it should ping back. When I approve them they are published
Hello. So exciting! I’m interested in Stitch 1, good to know that I don’t have to finish after one week, if I don’t have time. A lot of generousity with knowledge!
Just joined and very excited. Thank you! Looking forward to this fun year ahead of me.
Happy new year. Thank you for the first stitch. As I am experienced I would also like to do Beyond TAST as well. How do I sign up for that one please.
Jan No need to sign up just join in.Its the same Facebook group too
Pingback: Biting off more than I can chew? – Paper, Plastic, String – and Fabric and Thread too
I live in York, England and I love the generosity of the needlework community. Thank you Sharon for sharing your time, skills and expertise to those of us who are so excited about starting this journey. My best wishes to all xx
Pingback: Small finishes | a case of the Crafties
I would like to join. Not sure how much I will get done but will give it a try!
Hi Marylyn – as long as you subscribed to Pintangle – ie followed the directions in the article above you will be subscribed – have fun
Hi Sharon …
Stumbled across Pintangle today and WOW! Love what I see! I’ve signed up for posts to be delivered to my email.
Want to be part of TAST, too! Excited!
Margaret
Hi Sharon, I’m hoping this is where I sign up for TAST 2018. I’m looking forward to it.
Thanks’
Hi please add me to mailing list of weekly stitches in 2018, thank you.
I want to take part and please send me a notification every week.
Oh my dear friend Sharon, how much time has passed! This is a great idea for me too! A new project! I love what you did and do! I just put my mail in your newsletter. Hugs and love!
Pingback: 1 Year’s Stitches | CrazyQstitcher
Hi Sharon! I am so excited to finally join TAST for 2018. I have a quick question – I already follow you through feedly (a newsfeed app), so is it still necessary to join the email subscription?
I also wanted to say I LOVE your new book. I have been collecting supplies to make my first crazy quilt project, and never had the confidence to stitch it. The book is amazing – so clear, so clever, so fabulous. I tell everyone I meet who sews about it! 😀 Thanks for having this blog and doing all you do:D
CaLynn I am so pleased you like the book. No need to sub to the email subscription if you use feedly ( I use it too ) Thanks for such a lovely comment and enjoy TAST
I just found you and am excited to jump into your challenges for the new year. I’ve been pondering what direction to go in the new year and the TAST and 2020 project looks perfect.
I will go visit the Facebook groups too. My mind is now spinning with ideas.
Thank you!
Have fun exploring those ideas pleased you are joining the challenge
Hi Sharon,
Do I have to sign up for next year’s Beyond TAST or will it be with the other TAST information. I am not sure how much time I will have at the beginning of the year but want to try. Still not finished my 365 Quilt from 2016 and finding it a challenge to complete.
Thanks for a marvellous year of stitching and plenty of challenges along the way.
Hi Lesley If you have subscribed to Pintangle you are good to go
I just stumbled onto TAST. I have embroidered for many years and I look forward to learning new stitches in the coming year. Thank you!
Sharon, I️ think I️ signed up for TAST. Can you verify?
HI Paula there is no sign up – just join in
I did this TAST either last year or the year before and really enjoyed doing them. I think I woud like to join in again this year. I put allthose stitches in a cloth book adding pages as each was filled up. I think I would like to try a different route this time. I may already be on you mailing list.
If you received this article in you email – then you are on the mailing list
Pingback: Rainbow Stitch Embroidered Sampler | Mostly Knitting Blog
Pingback: TAST Catchup Part 2 and More! | Mostly Knitting Blog
Pingback: TAST Catchup Post – Part 1 | Mostly Knitting Blog
Pingback: A Year of stitches – 3rd Hoop | CrazyQstitcher
Pingback: Revisiting Pekinese Stitch for TAST | Mostly Knitting Blog
Pingback: Algerian Eye Stitch Embroidery Sampler for TAST | Mostly Knitting Blog
Pingback: Revisiting Shell Chain for the TAST Embroidery Challenge | Mostly Knitting Blog
Pingback: Basque Stitch Embroidery Sampler for TAST | Mostly Knitting Blog
Pingback: Alternating Up and Down Buttonhole Stitch Embroidery Sampler | Mostly Knitting Blog
Pingback: TAST – Fancy Herringbone Stitch Sampler | Mostly Knitting Blog
Pingback: TAST – Magic Chain Stitch Embroidery Sampler | Mostly Knitting Blog
Pingback: TAST – Fern Stitch Sampler | Mostly Knitting Blog
Pingback: TAST – Fancy Bobbin Edging, at Last! | Mostly Knitting Blog
Pingback: TAST Sampler – Satin Stitch on Canvas | Mostly Knitting Blog
Pingback: TAST Revisiting Blanket/Buttonhole Stitch | Mostly Knitting Blog
Pingback: TAST Revisiting Running Stitch | Mostly Knitting Blog
Pingback: TAST Catch Up Sampler, Stitches 60 – 68 | Mostly Knitting Blog
Pingback: TAST – Tulip Stitch and Woven Detached Chain Sampler | Mostly Knitting Blog
Pingback: Some simple TAST stitches | CrazyQstitcher
Pingback: Taking a Stitch and it’s Tuesday | Little Orphan Stitch
Pingback: Lock and Feathered Chain Stitch Embroidery Sampler | Mostly Knitting Blog
Pingback: Up and Down Buttonhole Stitch – TAST Week 55 | Mostly Knitting Blog
Pingback: Instastitch | Coloring Outside the Lines
Pingback: What a difference a day makes | Carlseapatch's Weblog
Pingback: Knotted Buttonhole Band Embroidery Sampler for TAST, Week 54 | Mostly Knitting Blog
Pingback: Bunny Embroidery Panel | Mostly Knitting Blog
Pingback: TAST Turkman Stitch Embroidery Sampler | Mostly Knitting Blog
Pingback: TAST Sheaf Stitch Embroidery Sampler | Mostly Knitting Blog
Pingback: Catching Up on the TAST Embroidery Challenge | Mostly Knitting Blog
Pingback: TAST #25 Bonnet sew | MoonBady
Hi Sharon, I have just found your wonderful website and look forward to learning lots of new embroidery stitches. Your tutorials are so easy to follow and look forward to adding many new stitches to use in my sewing projects, thank you.
Pingback: Struggling | puddle of Dreams
Hello Sharon I was wondering if there is any way you could email me the list of Alphabetical TAST stitches. I was trying to download them to my tablet and it won’t let me. I love the way you show how to do the stitches I am still learning. Please and thank you.
Lisa I just sent you an email
Could I get that alphabetical list as well?
Pat just copy the list – but if you are thinking of taking the challenge the list will not be the same next year
Ciao, ho appena trovato questo blog che mi interessa molto, mi sono iscritta e vedrò di fare qualcosa. Io non ho un mio blog personale, ma ci sono su Fb e questa tecnica mi attrae molto. Avevo già in mente di fare un libro utilizzando tessuto canvas, ma è ancora tutto da decidere. Col tempo….Buon lavoro e complimenti per la tua abilità e creatività! Gabriella
Hi Sharon.I was following the list from 1-26 as listed here and joined again with the 27 which is from the list below..is there an order that I could follow each week from here as I am confused.I couldn’t find week 28 ,which is this week.please guide me as I have been away for some time..thanks.-Ash*
Ash I have just updated it
Pingback: Stitching Resources for a Productive Year
Pingback: TAST 2016 – all ready to go! – Hillview Embroidery
Pingback: Happy New Year! Welcome to 2016 | Hillview Embroidery
Would like to join the group and see future posts.
Debra the subscription sign up in in the side bar – and welcome!
Pingback: Half Chevron Stitch Sampler | Mostly Knitting Blog
Pingback: Crossed Buttonhole Stitch Sampler for TAST Week 17 | Mostly Knitting Blog
Pingback: Wheatear Sampler for TAST, Week 16 | Mostly Knitting Blog
Pingback: French Knot Sampler for TAST 2015 | Mostly Knitting Blog
Pingback: Embroidered Stem Stitch Sampler for TAST Week 14 | Mostly Knitting Blog
Pingback: S is for Satin Stitch | Mostly Knitting Blog
Pingback: Top Stitching Tutorials and Books
Pingback: TAST Week 11: Embroidered Whipped Wheel Sampler
Pingback: Embroidered Running Stitch Sampler for TAST, Week 10.
I really appreciate the concise directions and pictures. These are very helpful especially as a lefty where I need to make some adjustments to stitches!
I did join the Facebook group, but I also like other social media. I’m wondering if there’s a tag or hashtag anyone’s used to identify these? Could also be used on FaceBook. I tired to look up #TAST on Instagram, but hardly anything came up for embroidery, it then went to #taste and longer words from there.
Maybe #TASTembroidery ?
Debbi to be honest you are the first person to ask The #TASTembroidery makes sense so I have added it to the post. Also have posed the question in Facebook as to what hash tags people want to use and #PintangleTAST has beed suggested
Pingback: TAST #1 – Fly Stitch | Stitch All Day
Hi Sharon I am super excited to start my TAST 2015!! I am a beginner and this site is just a great way to get started with hand embroidery.
I have just discovered this but I am definitely going to take up the challenge! Woo hoo. I love embroidery. I am going to commit to doing two a week through 2015. BIG committment!
Pingback: All the flags are flying | Nickerjac
Pingback: Link Round Up | Hannah's cook & craft blog
Pingback: TAST Nos. 129 + 130 Lock and Double Lock | CrazyQstitcher
Pingback: TAST stitch No.128 re-blogged | CrazyQstitcher
Pingback: Take A Stitch Tuesday- Nos. 124 and 125 | CrazyQstitcher
Pingback: TAST Nos.122,123-Chained Bar and Woven Chained Bar | CrazyQstitcher
Pingback: TAST Nos. 120-121 | CrazyQstitcher
Pingback: TAST – Knotted Kretan Stitch | Tenar's cave
Pingback: Continuation of the banding | fiberpaperart
Pingback: TAST 20 -Butterfly Chain Stitch | Tenar's cave
Once again, I’m following TAST for a few stitches – and I have created a page with links to my tast postings – or let’s better say I’m in the process of doing so.
Sharon, I only wanted to ask if that page is ok or if you think that’s leeching on your content.
Looks OK to me Tenar as you are linking not copying which is the correct thing to do online -good netiquette if you like
Pingback: TAST 2014 Nos.110,111,112,113 | CrazyQstitcher
Je poste un petit com simplement pour complimenter
l’administrateur
Pingback: Getting on with getting on! | More Cold Tea!
Pingback: TAST Nos. 104 + 105 | CrazyQstitcher
Pingback: Sharon’s stitches by number, 91-94 | CrazyQstitcher
Pingback: Sharon’s stitches by number 80-83 | CrazyQstitcher
Pingback: Sharon’s stitches by number 75- 79 | CrazyQstitcher
Pingback: Stitches by number- 71, 72, 73, 74 | CrazyQstitcher
Pingback: TAST No 103 – Beaded Butterfly chain stitch | CrazyQstitcher
Pingback: Sharon’s stitches by number – last batch of 6 | CrazyQstitcher
Pingback: Sharon’s stitches by number | CrazyQstitcher
Pingback: CrazyQstitcher
Pingback: TAST 2014 Triangular Buttonhole- 2 versions | CrazyQstitcher
Pingback: Cast on and so on | In the Ever After
Pingback: Kantha – deco style! | More Cold Tea!
Just in case you want to see what I did with a BEADED version of #58 Woven Detached Chain Stitch:
http://queeniepatch.blogspot.jp/2014/02/stumpwork-lady.html
Pingback: Taken up running! | More Cold Tea!
Hi Sharon,
My samples
Everything is very open with a really clear clarification
of the challenges. It was definitely informative. Your site is
useful. Thank you for sharing!
Pingback: Pintangle: Take a stitch Tuesday | pardalote makes
Pingback: Rain starts more play! | More Cold Tea!
Pingback: Back in the swing of things………. | More Cold Tea!
Pingback: At last I’m up to date!! | More Cold Tea!
Pingback: Too Cute Tuesday – Knotted Feather Stitch Elephant sampler by the stitchsmith
Hello Sharon, I must tell you how very practical this is, to find your stitches by number (or letter). I missed the stitches 53 – 55 and could so easily find them today on your list, copy them and stitch them high up on the mountain into my new little stitch reference booklet – which I just started. Thank you for this wonderful site.
Pingback: Week 63 Scroll stitch – | More Cold Tea!
I love Queenie’s crown.
I am curious about the challenge – I have only seen my Palace Gates and Queenie’s Crown – are these the only two challenge pieces, or have I missed more somehow?
Peggy
Peggy people leave links to their web pages on the comments at the latest TAST post. Follow the link in the second paragraph of this page
My humble offering for the TAST design challenge:
http://queeniepatch.blogspot.jp/2013/03/tast-design-challenge-or-disqualified.html
Will this do as a link ? You can tell am cmputer illiterate !
Peggy look in your email I just sent you a reply explaining how to do it.
Tast 55 is pretty and nice to do. Thank you.
When Challenge is done do we take picture and post on SF as usual ? or – keep until April 2nd – and then ?
I don’t know how to post on Pin Tangle ??
HI Peggy Post the picture on SF and leave a link here
Pingback: Stitching Skills-in-Progress » 2Create in Color
Just thought I’d show the sampler I made for the first 52 TAST stitches I have learned. It has been such a pleasure to learn them all. Many thanks, Sharon.
http://queeniepatch.blogspot.jp/2013/02/the-tasty-bird-summary-sampler.html
Pingback: First Steps « Soentangles
Dear Sharon,
I’ve finally finished my TAST-piece 2012! It contains all of last year’s stitches and a few extra’s. The measurements are 37×39 cm. It has been great fun working on this piece and interacting with all the other TASTers. Thank you very much,
Jessica
Pingback: Too Cute Tuesday – Knotted Feather Stitch Elephant sampler by the stitchsmith
here is the link for the knotted fether stitch, I do not know if I am posting it in the right place, please let me know Sharon if I have done it wrong.
wow!!!!!!!!!!!!!
Waiting
viji
I want to do the rerun on 2012, And also continue with 2013, I am learning so much and I retired in July so I can give this so much more attention,. Thank You
Hi Nancy TAST will start up again on next Tuesday
Pingback: Creative goals for 2013 | perpetual amateur
I am working through the TAST 2012 stitches in numbered order starting next week — doing a TAST 2012 re-run. Anyone doing the same, feel free to access my list of stitches/dates (or whatever might be helpful to you) by clicking through to my new blog for it (click on my name above.)
Pingback: Purpose and Goal | tast2012rerun
Pingback: Week 47 Portuguese Border Stitch « eclecticlamb
Well that is so ME to find a fun challenge towards the end of the year! Will you be starting a new TAST next year, or should I try to play catch-up so late in the challenge? I’m a very new embroiderer, and this looks like a perfect way to get more experience. 🙂 You are amazing and I love the site! 🙂
Brittany – I might continue this next year ( I am not sure yet) but I would suggest you start at the beginning and do at least the first 12 stitches because all the foundation stitches are covered there. If you do those when you get to the more complex stitches you will be able to do them. As I say I am not yet decided about next year but no matter what if you do the basics it will set you in good stead.
Pingback: Brown Sampler | Dmcthread's Blog
Pingback: Tast 3 week 40, Beaded Hedebo edge « CrazyQstitcher
Pingback: Week 38 Drizzle Stitch « eclecticlamb
Sharon – when you show the pictures of the ones you chose each week, I have not seen some of them. I just get them from StitchinFingers, where can I find the others ? They don’t seem to be in Pin Tangle.
Thankyou for all the work you do. Peggy
Peggy the challenge is run from pintangle every Tuesday – just go to the blog front page and for back links either go to the category or check the bottom of the TAST FAQ page as there is a list of all the stitches. People often leave comments here (on the blog ) and not at stitchin fingers. In fact there is another whole crowd on Facebook who I never see too. It is one of the problems with social media it is very diverse! As I say every week when I post the challenge people are supposed to leave a comment here.
Hi! I found your site yesterday or the day before & just found out about TAST… and I may try it! Do you ever go back to the beginning? Also, are these good for beginning stitchers?
🙂
Jessica TAST has just started up again we are 2 weeks in so feel free to join in
Pingback: Tast 3, week 39 – Knotted Buttonhole « CrazyQstitcher
Pingback: Tast 3,week 38 Drizzle stitch « CrazyQstitcher
Pingback: TAST 3, week 37 -Pistil stitch « CrazyQstitcher
Pingback: Weeks 36 & 37 TAST Catch-up & Pistil Stitch « eclecticlamb
Pingback: Orts | Blackwork Lessons
Pingback: Attachment to Guilt Can Kill Creativity | The Shop Sampler
Pingback: Blackwork Experimental Sampler In Progress | Blackwork Lessons
Pingback: TAST 35 Sheaf Stitch « eclecticlamb
Pingback: Week 34 Linked Double Chain Stitch « eclecticlamb
Pingback: TAST 3 Week 35 – Sheaf stitch « CrazyQstitcher
Pingback: Tast 3, week34 « CrazyQstitcher
Pingback: CQJP and TAST week 33 | Time use by Bernice
Pingback: Return to TAST 2012 | The Shop Sampler
Pingback: Week 33 Pekinese Stitch « eclecticlamb
Pingback: Week 32 Cast-on Stitch « eclecticlamb
Sharon, can you please continue placing each week’s link on this page? I am not online often during the summer, and it’s so much easier to come here to get the stitches I’ve missed. Thanks.
Pingback: Project update on the TAST Stitch Sampler | iHanna's Blog
Pingback: Week 6 TAST Chevron Stitch « eclecticlamb
Pingback: Week 30 Oyster Stitch « eclecticlamb
Pingback: Week 29 Basque Stitch « eclecticlamb
I am trying to play a mad game of “catch up” with the “Take A Stitch Tuesday” challenge — but is it no longer possible to link my sampler stitches to the originating home page of that week?
Here is my Cretan Stitch link:
http://cmwinter.blogspot.com/2012/02/cretan-stitch.html
and my Herringbone:
http://cmwinter.blogspot.com/2012/07/herringbone-stitch.html
more on the way ….
Pingback: Week 28 TAST Up and Down Buttonhole « eclecticlamb
Pingback: Week 27 TAST Bonnet Stitch « eclecticlamb
Pingback: Week 26 TAST Palestrina Stitch « eclecticlamb
Pingback: TAST catch-up Weeks 27,28,29 « CrazyQstitcher
Another stitch that was new to me….and I enjoyed. That makes things go more quickly. http://timeusebybernice.wordpress.com/
I really enjoyed week 28….Up and Down Buttonhole stitch. I don’t think I did it quite the way the directions said…but the stitch result is the same. Anyway it was a fun stitch. http://timeusebybernice.wordpress.com/
Pingback: TAST 16: Lavender French Knot | Thrifty Finn
Pingback: Week 25 TAST Cable Chain Stitch « eclecticlamb
http://latha-mycreations.blogspot.com/2012/07/tast-week-28-up-and-down-buttenhole.html
My sampler for TAST week 28.
I really struggled with the Bonnet stitch for week 27. I had to look at a number of different directions and try for 5 days before I got it. Oh well that was a long learning curve. for me.
http://timeusebybernice.wordpress.com/
Pingback: Take a Stitch Tuesday: Bonnet Stitch « Abiding in the True Vine
Pingback: Take a Stitch Tuesday: Palestrina Stitch « Abiding in the True Vine
I’d never heard of the Palestrina stitch before and I really enjoy doing it! http://quiltisland.blogspot.com/2012/07/palestrina-stitch.html
week 26 Palestrina stitch completed….. Thanks http://timeusebybernice.wordpress.com/
Thank you Sharon for TAST. I am really enjoying this. I used to do embroidery long back and now its time to catch up all that and learn new stitches and I am so excited.
As I looked back it seems I have missed posting my progress. I have kept up each week but only posted on my blog and not here. oh well….. http://timeusebybernice.wordpress.com/
Week 25 cable chain was a bit of a struggle as when I made a mistake I had a problem getting out of it and restarting. Of course it got better as I did more.
Pingback: Take a Stitch Tuesday: Cable Chain Stitch « Abiding in the True Vine
Well, I am now sufficiently inspired to join in. ha! Took me long enough to figure out what TAST is–after weeks of seeing stitch samples on flickr and now finally finding stitchin fingers. I am so excited to find all you do Sharon B.!! I think it’s just what I needed. I know the most of these stitches. I do some of them in beaded embroidery. But I am rusty, rusty, rusty on quite a few. So this is going to be really good for me. THANK YOU, SHARON!!!!
Pingback: Take a Stitch Tuesday: Buttonhole Wheel « Abiding in the True Vine
Pingback: Week 24 TAST Buttonhole Wheel « eclecticlamb
Pingback: A Chain Stitch Sampler | The Shop Sampler
Pingback: Weeks 22 & 23 TAST Knotted Cretan Stitch & Catch-up « eclecticlamb
Pingback: Stitchers’ UFO Challenge Update | The Shop Sampler
Pingback: Stitch Challenge: TAST OR Math? | The Shop Sampler
Pingback: Take a Stitch Tuesday: Knotted Cretan Stitch « Abiding in the True Vine
Pingback: CQJP and TAST week 22 | Time use by Bernice
Pingback: TAST goes crazy again « Kids by hand
Pingback: Week 21 TAST Butterfly Chain Stitch « eclecticlamb
Pingback: Take a Stitch Tuesday: Butterfly Chain Stitch « Abiding in the True Vine
Pingback: Butterfly Chain, A Real TAST Challenge For Me | The Shop Sampler
Pingback: Take a Stitch Tuesday: Bullion Knot « Abiding in the True Vine
Pingback: Week 20 TAST Bullion Knot « eclecticlamb
Pingback: The Bullion Stitch, Not To Be Confused With Bouillion Cubes! | The Shop Sampler
Pingback: Take a Stitch Tuesday: Half Chevron « Abiding in the True Vine
Pingback: It Began on Interstate 65 | The Shop Sampler
Pingback: Week 19 TAST Half Chevron Stitch « eclecticlamb
Pingback: Week 18 TAST Crossed Buttonhole Stitch « eclecticlamb
Pingback: Button, Button: What do you think of my crossed buttonhole stitch? | The Shop Sampler
Pingback: Tast 3 Week 18- Crossed Buttonhole « CrazyQstitcher
Pingback: Take a Stitch Tuesday: Crossed Buttonhole Stitch « Abiding in the True Vine
Pingback: CQJP and TAST week 18 | Time use by Bernice
Cant get the link bit so have posted in om my page at
http://www.stitchinfingers.ning.com/profile/NicolaThomson
Nope that link didnt show, sigh.
I am redirecting to my stitchinfingers page :- http://stitchinfingers.ning.com/profile/NicolaThomson
You will find the pic at the abiove place..still do not understand this Im afraid.
Nicola all comments are moderated by me to combat spam comments. when you leave a comment – you should have that written on the screen saying the comment is moderated and waiting approval.
Pingback: Take a Stitch Tuesday: Wheatear Stitch « Abiding in the True Vine
Pingback: April’s TAST and CQJP | Spare Moments Stitching
http://stitchinfingers.ning.com/profile/medhadevdas
wheatear stitch is very interesting .i liked it very much
thank you
Pingback: CQJP and TAST week 17 | Time use by Bernice
Pingback: Week 17 TAST Wheatear Stitch « eclecticlamb
Just had to say that I’ve found a new stitch to love!!!
Week 16 Wheatear 🙂
Thank you, Sharon X
Sorry, Week 17 !
Pingback: Satin stitch and French knots « In the Ever After
Week 16 already! My how time flies when…..you are trying something new. I did French Knots as flower centers when I was a child. This reminded me of the struggle they were but how Neat I thought them to be. Being Snow Birds and getting ready and leaving Yuma, AZ for the summer + had me rushing to keep up once again. My goal is to KEEP UP!
http://timeusebybernice.wordpress.com/
Pingback: CQJP & TAST week 16 | Time use by Bernice
http://www.flickr.com/photos/78337348@N08/6959620626/in/photostream
week 16. hope i’m putting this in the right place.
Pingback: Week 16 TAST French Knots « eclecticlamb
Pingback: TAST French knots, Satin and Stem stitches « CrazyQstitcher
Pingback: Take a Stitch Tuesday: French Knot « Abiding in the True Vine
Pingback: Week 16 ? French Knot (TAST 2012) | ????????? ???
Pingback: Week 15 TAST Stem Stitch « eclecticlamb
Mary You are more than welcome to join in. The stitch of the week is announced every Tuesday and there is a list of past stitches on this page.
Hi Sharon,
You might want to edit your instructions for
bonnet stitch in your dictionary. Especially the
left and right parts and through and not through
the fabric at the beginning.
Fondly,
Anna
Hi Anna – yes in fact the whole stitch dictionary is getting a good look at soon as it is an old site that was hand coded in 1996 as old static web pages. By the end of this year I hope to have a complete overhaul and in a format that will I can change and update the pages more frequently.
What a nice project ! May I join in ? Which is the current stitch to practise ?
Congratulations for your embroideries.
Pingback: Week 14 TAST Satin Stitch « eclecticlamb
this is my favourite stitch – thank you for a lovely 15 weeks. am looking forward to the rest of the year! http://knitspurlsandhooks.blogspot.in/2012/04/tast-15-stem-stitch.html
Pingback: Holiday on Norfolk Island « CrazyQstitcher
Pingback: Take a Stitch Tuesday: Stem Stitch « Abiding in the True Vine
Pin Tangle becomes more fascinating to me each time I look around.
I am interested in receiving your newsletter. I really want to be in the loop, as such don’t want to miss anything. If there is a cost involved, please let me know.
Thank you, Lynnette Olson
I am really enjoying the experience! Thank you, Sharon 🙂
Barbara
Pingback: March’s TAST and CQJP | Spare Moments Stitching
I’m totally confused. Can’t find this week’s post on satin stitch–did I dream it???–so don’t know where to link to my blog.
Thanks so much for the opportunity.
Pingback: Take a Stitch Tuesday: Satin Stitch « Abiding in the True Vine
Pingback: Delectable fabrics « In the Ever After
peut on encore participer à ce TAST ???? je sais que vous en etes sur la fin… mais ne peut on pas repartir de la semaine 1?
j’attends impatiemment votre réponse car je trouve fantastique ce TAST !!! je ne le connaissais pas et je viens de le découvrir !!! merci par avance (j’habite à l’ile de la Réunion )
Je crois que vois pouvez commencer quand vous voulez. Nous sommes seulement a la 14e semaine. Si vous voulez recommencer a la premiere, ce n’est pas une probleme.
Which (in bad French) was roughly – I think you can start when you like. We’re only on week 14. If you want to go back to week 1, it’s not a problem.
Thank you, Sharon. I have met so many cyber friends while participating in your challenge. I really appreciate all you do for the stitching community. This is my second time doing TAST.
Pingback: Week 13 TAST Catch-up Week « eclecticlamb
Pingback: Week 12 TAST Barred and Alternating Chain Stitches « eclecticlamb